
How to Install Active Directory on Windows Server 2022
How to install Active Directory on windows server 2022 is a hot topic for domain administrators, as Active Directory is a powerful tool that allows administrators to manage user accounts, computers, and security policies across an organization's network. In this article, we'll guide you through the process of installing Active Directory on Windows Server 2022.
Active Directory is a powerful tool that allows administrators to manage user accounts, computers, and security policies across an organization's network. It is a key component of Windows Server, and with the release of Windows Server 2022, how to install Active Directory has become even easier. In this article, we'll guide you through the process of installing Active Directory on Windows Server 2022.
Process of Installing Active Directory on Windows Server 2022
To ensure a successful installation, please log in to your Windows Server 2022 environment as an administrator. Then follow the steps below to install Active Directory.
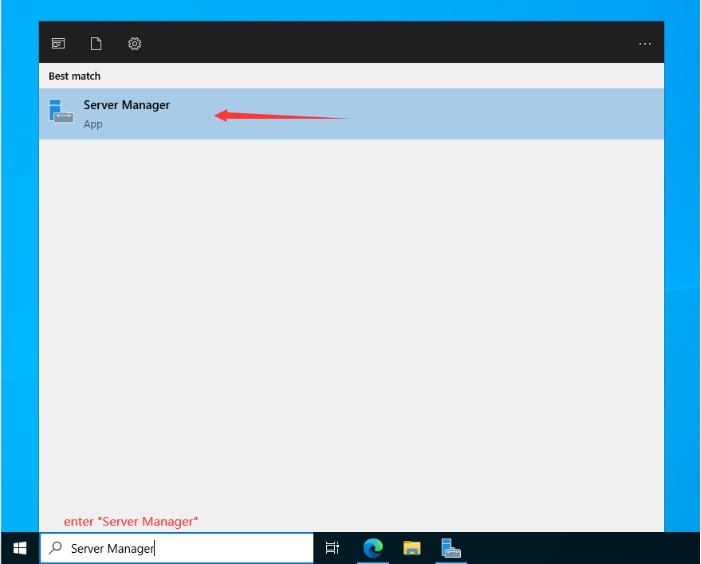
Step 1. Log in to Server Manager
To initiate the installation process for Active Directory Domain Services, please enter "Server Manager" in the Windows search box. After opening it, refer to the image below and follow the outlined steps.
Step 2. Select “Add Roles and Features”
Here are two ways to access to the "Add Roles and Features”. You can either click on the option on the home page or right-click “Manage” to choose the function from the context menu.
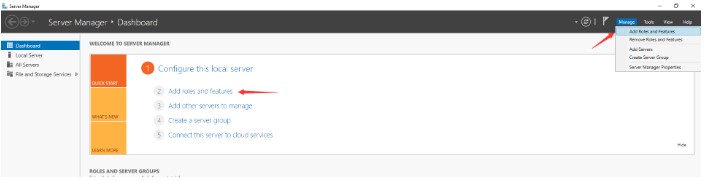
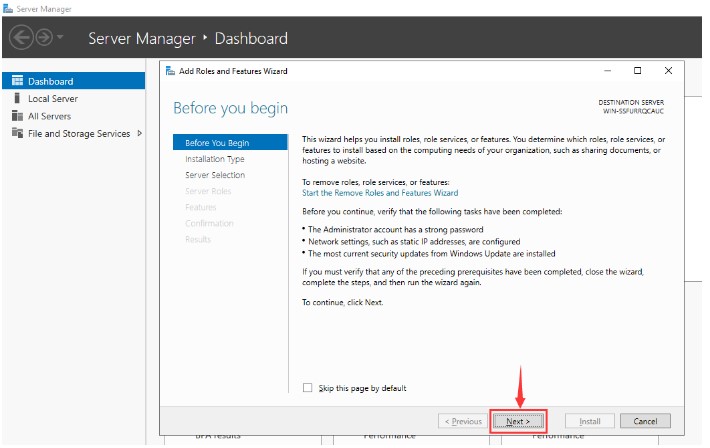
The process will open the “Add Roles and Features Wizard” page, which proceeds with the Active Directory installation. Please click on “Next”.
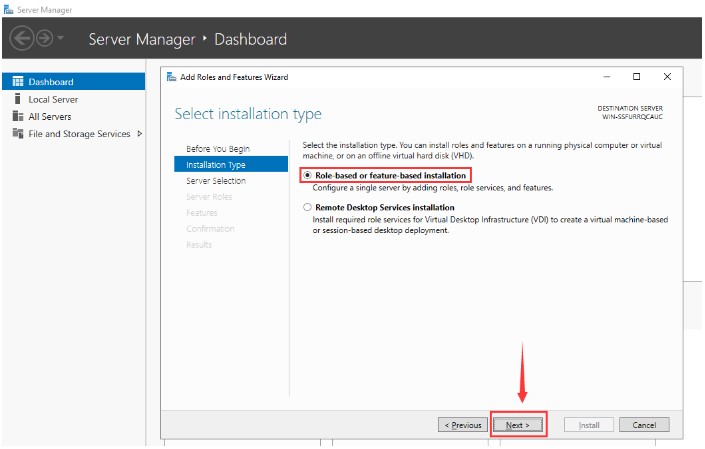
Step 3. Select Installation Type
On the "Installation Type" screen, select "Role-based or feature-based installation" and click "Next."
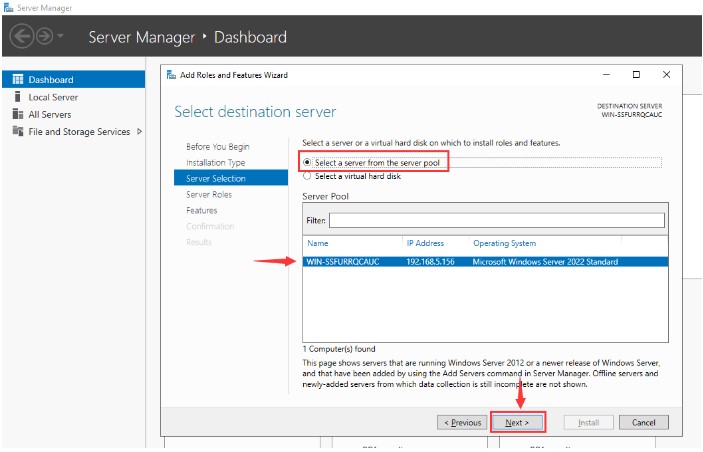
Step 4. Server Selection
In the "Server Selection" screen, select the server on which you want to install Active Directory and click "Next". Taking the picture as an example, we chose the local Windows Server 2022 Standard as the reference.
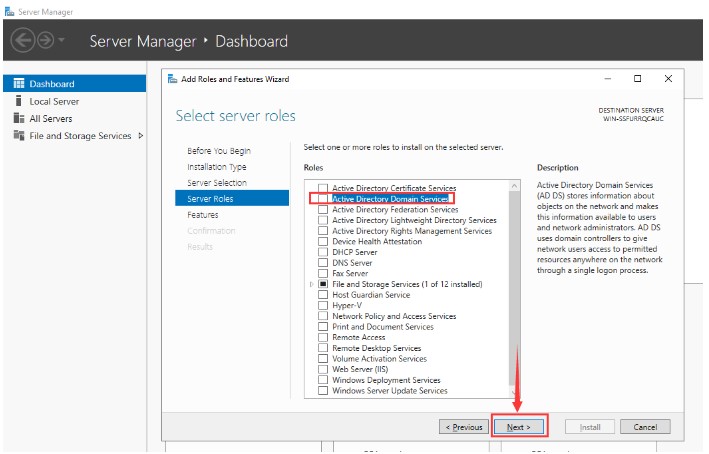
Step 5. Select Server Roles
All the previous settings will guide you to the "Server Roles" page where you will see multiple options with square checkbox beside them. To proceed, select "Active Directory Domain Services".
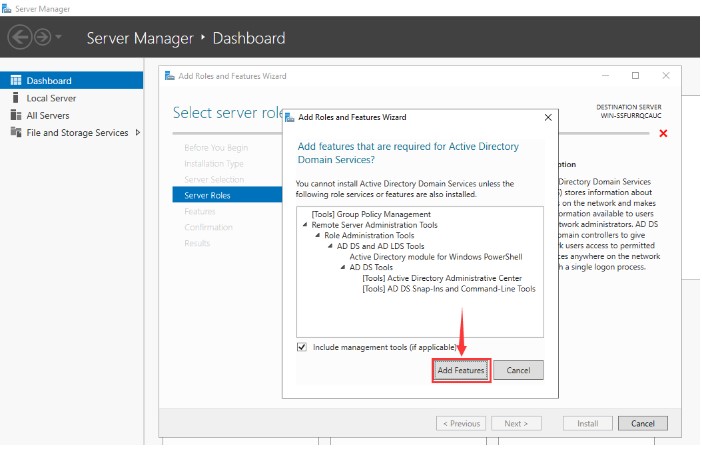
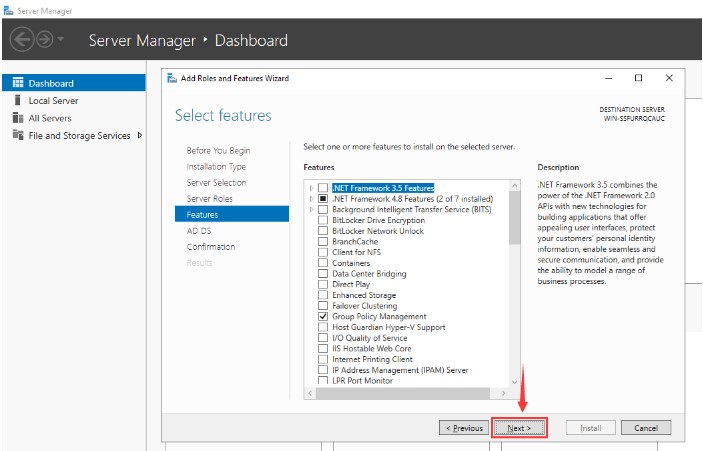
Step 6. Select and Add Features
The precondition to installing the Active Directory Domain Services is to add the necessary features. So please click “Add Features” first to select features and then proceed with the installation process.
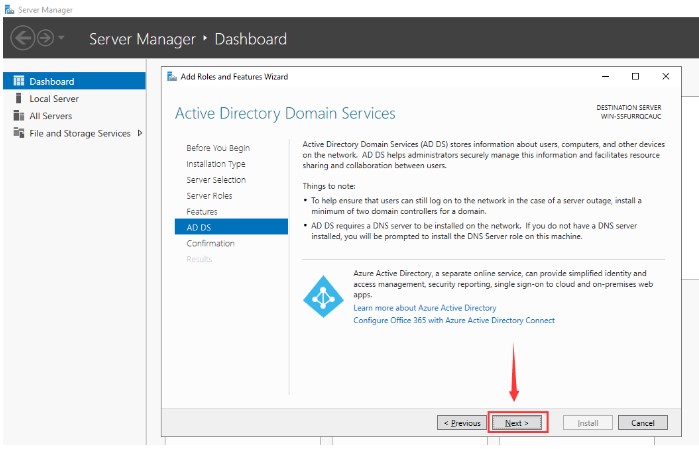
Step 7. Active Directory Domain Service
After step 6, you will be directed to the “Activate Directory Domain Services” page.
In the "AD DS" screen, review the information and click "Next".
Step 8. Confirm Installation Selections
Review your installation selections for confirmation before proceeding with the actual installation. You have the option to automatically restart the server if required. After checking, please click “Next” to move forward.
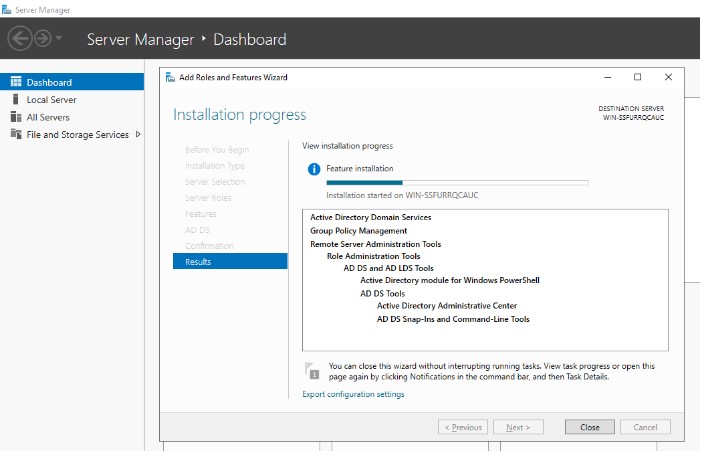
Once the previous settings are done, the installation will proceed.

After it finishes, please click “Close”.
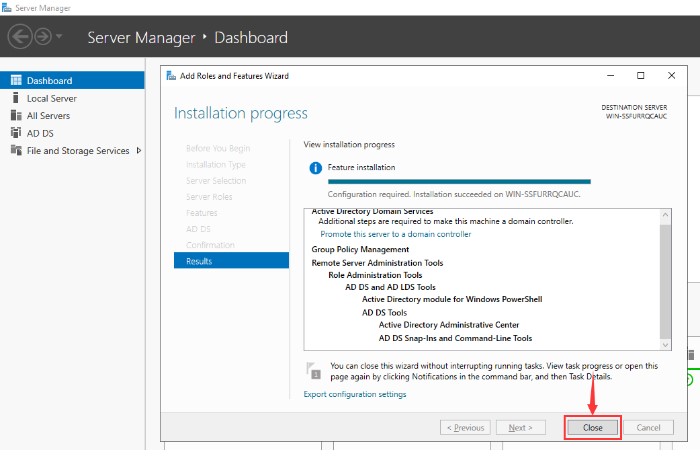
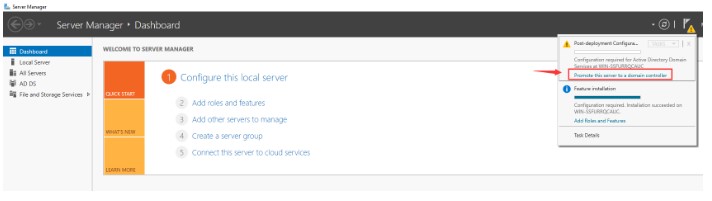
Step 9. Configure Active Directory Domain Services
After Active Directory Domain Services installation is complete, promote it to a Domain Controller. Please open Server Manager and locate the "Manage" tab, which will have a yellow exclamation notification next to it. Click on it and select "Promote this server to a domain controller".
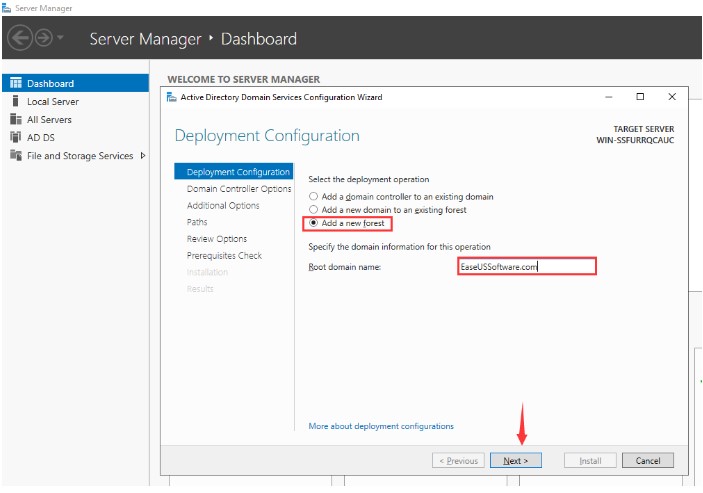
Step 10. Add a Forest
Click on "Promote this server to a domain controller", and a new window titled "Active Directory Domain Services Configuration Wizard" will appear. In this step, we will add a new Forest and customize your root domain name. However, if you have a different preference, you are free to choose the other options. Please enter your root domain name and click on "Next".
Step 11. Domain Controller Options
In the Domain Controller options, keep the default settings checked and set your password. After that, click on "Next".

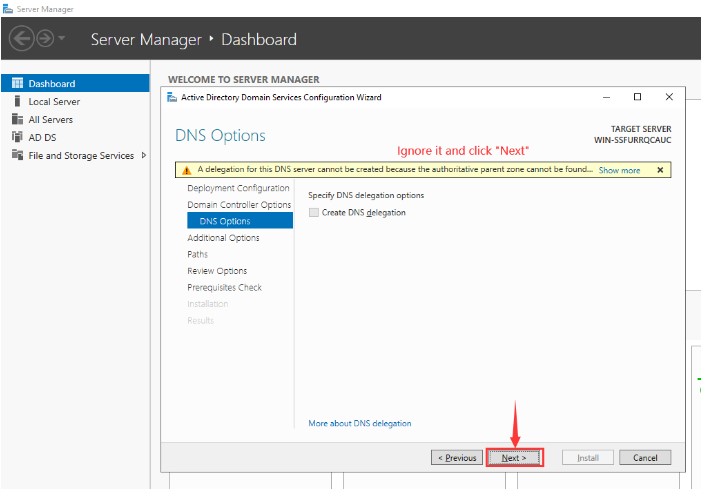
Step 12. DNS Options
On the “DNS Options” page, there will be a notification at the top stating "A delegation for this DNS server cannot be created because the authoritative parent zone cannot be found". Please disregard this message and proceed by clicking on "Next".
Step 13. Additional Options
On the page, you can modify the NetBios domain name as long as it doesn't exceed 15 characters. You are also able to keep the NetBIOS domain name as default. Once you have made your selection, click on "Next".

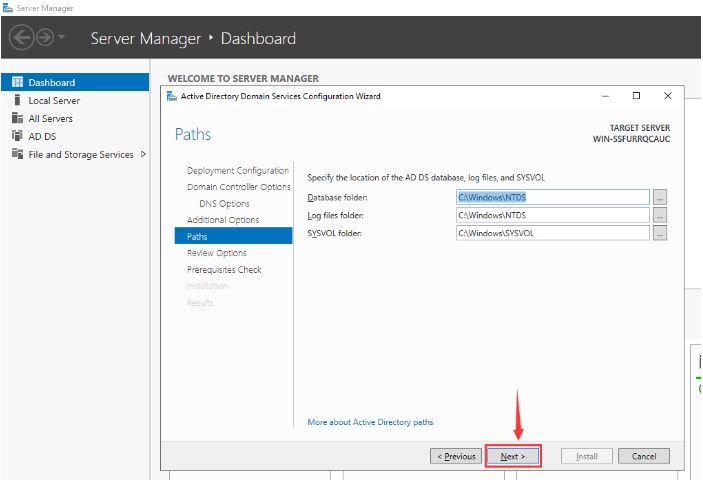
Step 14. Set Path
Please leave paths as default and click “Next” as shown below.
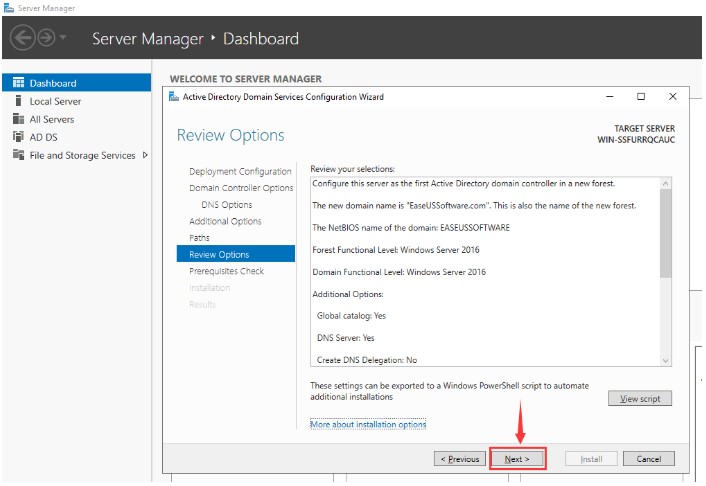
Step 15. Review Options
At this stage, the server will display a summary of the selections you have made. If you don’t want to change your choices, click on "Next" to proceed.
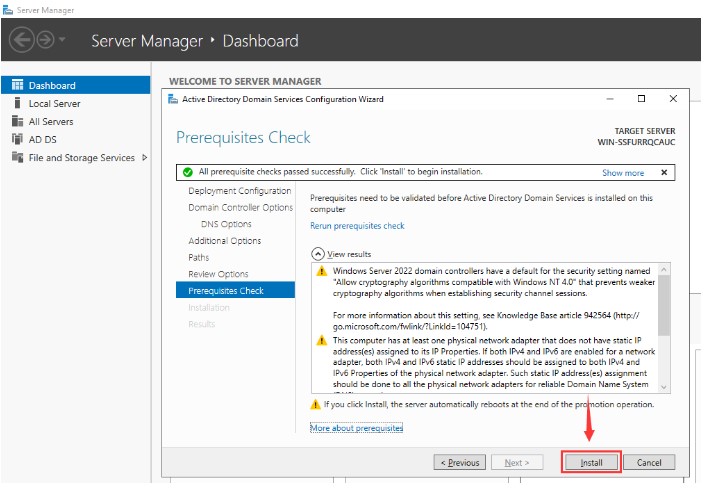
Step 16. Check Prerequisites
At this point, the server will provide a summary of the selections you have made. If you are content with your choices, proceed by clicking on "Install".
Then your server will reboot. After that, you can log into the Domain with your password.